Showing posts with label Dessert. Show all posts

Friday, January 20, 2012

Chocolate Ice Cream Pie

Read More on how I became a Baker?? and get more great recipes!

William Loves Ice Cream and Loves Chocolate, which makes sense why this has been his Birthday "cake" request the last 2 years! This is one of the most simple recipes ever... and it taste exactly like a  Blue Bell Fudgecicle! 


Chocolate Ice Cream Pie

Ingredients:
1 Pre-made Oreo Pie Crust
1 small box instant chocolate pudding mix
1 cup vanilla ice cream
1 cup milk
Cool Whip, topping

Directions:
In a blender, combine pudding mix, milk, and ice cream. Mixture will be thick and smooth.
Pour mixture into pie crust, cover and place in freezer for a minimum of 2 hours, until ice cream is set.
Before serving remove from freezer let set for 3-5 minutes for easier slicing. Top with a heaping mound of Cool Whip and some chocolate shavings!!! YUMMM!


Yes! It's That Easy!!

Tuesday, January 17, 2012

Cookies and Cream Cupcakes

Read More on how I became a Baker?? and get more great recipes!

I have to admit... I'm not a huge Oreo fan, but you mix them in a supreme cupcake and I can't seem to get enough! So here is...


Cookies and Cream Cupcakes
Recipe adapted from Annie's Eats


Directions

  • Preheat the oven to 350˚ F. Place ice cream cones in a muffin tin using tin foil to help sturdy them.
  •  In a medium bowl, combine the flour, baking powder and salt; whisk together to blend and set aside. With an electric mixer, combine the butter and sugar and beat together on medium-high speed until light and fluffy, about 3 minutes. Blend in the egg whites one at a time and vanilla extract.
  • With the mixer on low speed, beat in half of the dry ingredients just until incorporated. Add the milk and beat just until combined, then mix in the remaining dry ingredients. Gently fold in the chopped Oreos with a rubber spatula until evenly incorporated, being careful not to over-mix.
  • Evenly divide the batter between ice cream cones. Bake for 18-20 minutes until a toothpick inserted in the middle comes out clean.  Allow to cool in the pans 5-10 minutes, then transfer to a wire rack to cool completely.
  • Frost the cooled cupcakes as desired (I like cream cheese frosting). 


*I can't believe I didn't get a finished pic... I got in too big of a hurry! I swirled on a dollop of frosting, and topped with an Oreo cut in half.  William's class was super intrigued at the "Ice Cream Cupcakes", but unsure of the Cream Cheese Frosting.  If I'm making this for a classroom again, I will use Butter Cream Frosting!  

Sunday, January 15, 2012

Go-To Chocolate Cupcakes

Today I'm sharing with you the start of my wonderful journey into baking.  I have a big confession to make... I can't believe I'm about to share this with you, but... This is the first time I have ever actually made a cake/cupcake from scratch!  There I said it!  ....

Are those crickets I here... Are you still there? 

I know your probably shocked.   I just can't tell you how much I hate to measure and mix and measure and mix.... and well all of a sudden it has become some sort of relaxation therapy for me... What is that all about?  You think you know yourself and then yourself throws you a curveball...

Well, this recipe is now my Go-To recipe for Chocolate Cupcakes. It's moist, not too sweet, just chocolatey enough, perfectly domed deliciousness. This is now my new (replacing the cake mix)


 Go-To Chocolate Cupcake Recipe!
recipe from Annie's Eats


Ingredients:
½ cup cocoa
½ cup plus 1 tablespoon hot water
2¼ cups all-purpose flour
¾ tsp. baking soda
¾ tsp. baking powder
½ tsp. salt
2 sticks plus 1 tablespoon unsalted butter, at room temperature
1 2/3 cups sugar
3 large eggs, at room temperature
1 tbsp. vanilla extract
1/2 cup sour cream
Directions:

Preheat the oven to 350˚ F. Line cupcake pans with paper liners.
In a small bowl, combine the cocoa powder and hot water and whisk until smooth.
In another medium bowl combine the flour, baking soda, baking powder, and salt, and whisk to blend.
In an electric mixer, cream butter and sugar until fluffy, 3-4 minutes. Add the eggs one at a time, mixing well after each addition and scraping down the sides of the bowl as needed. Blend in the vanilla and then the cocoa mixture until smooth.
With the mixer on low speed, add the flour mixture in three additions alternating with the sour cream.
Divide the batter evenly between the prepared liners. Bake until a toothpick inserted in the center comes out clean, about 18-20 minutes.  Cool cupcakes in pan for 5 minutes, then transfer to a wire rack to cool completely

Love this with 
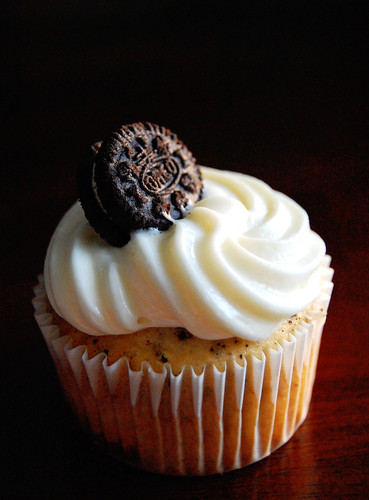
chocolate butter cream frosting . However, I made mine with vanilla buttercream frosting so I could add the requested color.

Friday, January 13, 2012

I'm a Baker?

First let me say... I do realize this post is following up a post about Healthy Eating.  And I'm sorry in advance for any temptation you may find here... 

You all know how much I love cooking.  I practically live in my kitchen, and God has blessed me with 3 growing boys, that are always ready to try out my latest recipe.  However, something I'm not sure you know is that I really really really don't like to bake!  Or Do I?   I'm not sure what is wrong with me... but I can't get enough of it lately!  In the last two weeks I have baked 4 dozen cookies, 120 cupcakes (3 different flavors), 12 muffins, and 2 ice cream cakes pies  FROM SCRATCH!!  and I LIKED IT!  I can't hardly believe it myself!  I may have a new found hobby.  So get ready... over the next two weeks are coming 5 of my new favorite recipes! Baking! :)


Go-To Chocolate Cupcakes
Cookies & Cream Cupcakes (baked in ice cream cones)
Oatmeal Raisin Cookies
Chocolate Ice Cream Pie
Snickerdoodle Cupcakes


Get ready! Here they come!

Thursday, September 8, 2011

Diet Soda Cake Recipe

So, this is very possibly the recipe that has changed my life as a "baker".  As most of you probably know, I absolutley despise measuring.  It slows me down. I like to experiment when I'm cooking. I like to eyeball things, and well... it's working pretty good for me, so why dirty up extra dishes... right?  Well, I now have a cake recipe in my possesion (it's all over the web) that fits my rules... the no measureing cup rules!! HOORAY!  So without further adue, here it is.


Diet Soda Cake Recipe
  • 1 boxed cake mix
  • 1 can of diet soda
  1. Pre-heat oven to 350 degrees.
  2. Grease muffin tin.
  3. Combine mix and soda with an electric mixer until well blended.
  4. Fill each tin 1/2 full.
  5. Bake according to package directions.
Tips: Cake tends to be slightly sticky, so make sure to spray tin or papers to keep cakes intact.

You can use any flavor combination of cake mix and diet soad/soda, but incase your not as experiemental as I tend to be, here are a few of my suggestions.  (Chocolate Mix+Diet Cherry Coke,  Chocolate + Diet Cream Soda, White Cake + Orange Soda,  White Cake+Diet Moutain Dew, Spice Cake + Orange Soda, Carrot Cake + Lemon Lime Soda) Really the options are endless! 

So what are you waiting for... get out there and start baking! Please report back:  I would love to hear what flavor combinations you come up with!

Friday, April 22, 2011

Easter Breakfast! Resurection Buns

Easter, like Christmas, is a very meaningful and important time for our family! We love and take part in the fun traditions like egg hunts, and Easter baskets stuffed with goodies, but are always looking for fun ways to keep our family focused on the actual reason we celebrate Easter. This recipe has become a fun project we feel accomplished just that. 

Resurrection Buns

*a can of Grand biscuits
*large marshmallows
*sugar
*cinnamon
*butter
  1. Preheat oven according to the directions on the biscuits.
  2. Flatten the biscuit out until it's about 5 inches across.
  3. The marshmallow represents Jesus.Explain that it is white because it stands for His purity and His sinless life.
  4. Roll the Marshmallow in melted butter sprinkle with cinnamon and sugar.  Explain how they anointed Jesus body with oil, and spices. 
  5. Place the marshmallow in the center of the biscuit, then fold the sides around it forming a "tomb". Pinch the sides of the tomb closed. Explain how Jesus tomb was sealed with a large stone.
  6. Place it crease side down on a baking sheet so they will not open while cooking. 
  7. Bake the buns. Follow package directions.
  8. Allow time to cool, the marshmallow will be very hot!


EAT UP!
  • When the children bite into their buns they will be surprised to find the center empty. The marshmallow has melted. As each child discovers the empty tomb, we repeat : He is not here for He is risen.
  • As you eat the biscuits,  talk about the sweetness of the biscuits and how sweet a gift Jesus gave us when he died for our sins, and then rose 3 days later proving He is our Savior and the Son of God!

I love this project.  It is a great way for my kids to remember what Easter really means, and for us to have a little fun while we do it.  Hope you enjoy!!

Tuesday, November 2, 2010

Cherry Lime Cake

So the girls are coming over for coffee? Family is coming for dinner?
Oh and you need a simple quick recipe to wow them... Here it is!
This is a to die for recipe!!!
Seriously, so easy and so worth it!

Cherry Lime Cake

By: Audra Caldwell
Blissfullydomestic.com/living-food